Congratulations! You are about to preserve flowers from your own special day...or those of someone you love...and create a keepsake ornament that will be treasured for many years to come. I have tried to make the instructions as simple as possible, but if you have any questions, please do not hesitate to contact me and I will help you with the process.

If you have purchased this kit ahead of the event, make sure that the bouquet you will preserve is placed in water as soon as possible after the event...and during, if possible. Keep the bouquet in water and out of direct sunlight, in a cool place, until you are ready to dry it.

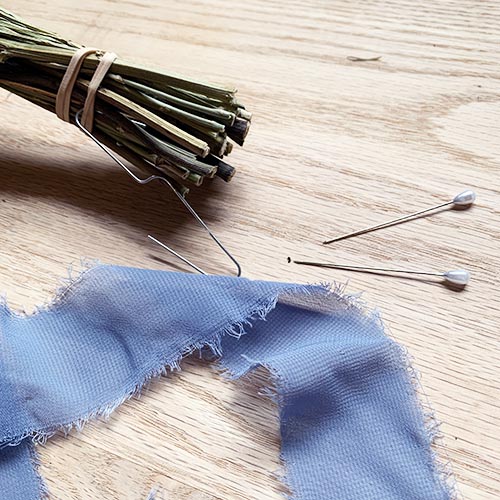
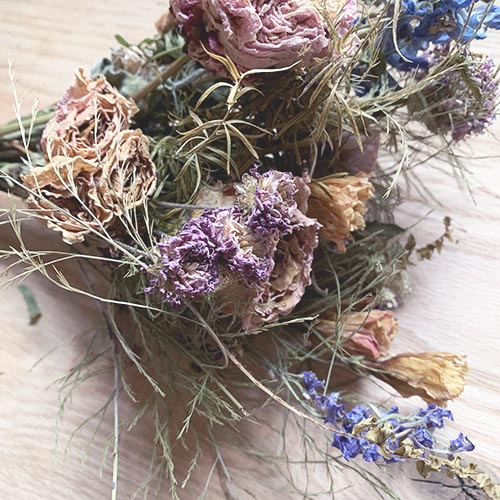
Rather than taking the entire bouquet apart, for this project I suggest drying it intact. If the stems are wrapped, remove any wrapping to expose just the stems. You can leave any wire, and add a rubber band if it needs extra support to keep the stems together. Open a large paper clip and hook one end through the wire or rubber band. Use the other end to hang the bouquet. Ideally, you would like to hang it in a cool, dry, dark place...dry basements or bedroom closets work the best. You will leave the bouquet for at least a month. Check on it periodically; most likely all will be fine, but if anything seems to be molding or turning very brown, remove those flowers or greenery with scissors.

Once the entire bouquet is VERY dry...the flowers and stems will be very "crispy"...you are ready to begin. Yes, it may look pretty rough. This is the same bouquet from the first picture, but trust me, you will be amazed at how pretty your ornament will turn out!

Take the bouquet apart and sort the flowers. Some flowers dry well, while others definitely do not! Remove anything that is very brown. If there is any dampness remaining, make sure to hang the bouquet for longer, ideally in smaller sections. Find the flowers that still retain some color. The flower pictured, for example, has some brown, but as the petals are removed, you can see the delicate pink petals deep inside the flower. Set the good petals aside.

Flowers that are on "spike" type flowers can be cut off gently with scissors and added to your pile.

Don't forget to include greenery! This asparagus fern is still soft and colorful.

Look at the stunning flowers from the dried-up bouquet! Once you have a good-sized pile, you are ready to begin filling your ornament.

This is the fun part! I ship the personalized ornament with the wood cap on top. Simply pull the top off and set aside. Begin filling the ornament by pushing the flowers and petals into the bauble one by one. You can use tweezers, a toothpick or a wood skewer to push them in if needed.

Once the ornament is filled to the top, you are ready to add the cap. Pinch the two wires together and slide them into the top...the wood cap will snap into place. I have added a twine hanger to the top, but if you have ribbon left from the bouquet that you want to use instead, you can cut off the twine hanger.

Tie the ribbon through the loop, knotting and trimming if needed...or...leave the twine hanger. Your ornament is done! The ornament can be stored in the box it shipped in when it is not being used to keep the colors vibrant and the glass protected. I hope you enjoyed making this very special keepsake!